Showing posts with label hydroponic setup. Show all posts

Monday, September 8, 2014

Greens on floating raft - failure


My last experiment also regretfully failed. After being replanted into hydroponic system plants significantly withered.
Seeking for a reason of my failures I checked pH level of fertilizing solution. Test showed value of about 8. I was quite surprised with such a fast rise of pH level of solution. By adding some vinegar I adjusted acidity of solution back to 6. But when I checked pH level next morning it was 8 again. I repeated procedure of adding vinegar next 2 days in a row and both times next morning pH level was 8. I decided to check pH level of clay to find out if it is the cause of my problems. I put a handful of clay into 1 l of water for half a day and checked it's pH afterwards. Result of this test was 8 although in the beginning it was about 6. It became clear that clay was guilty in my previous failures also. I decided to use more neutral substrate for my following experiments. Most probably it will be coco-coir.

Sunday, August 10, 2014

Greens on floating raft under LED-light

Finally I've received my order consisting of LED bulb. This is how LED bulb with red and blue diodes and 15W power looks like:
Wasting no time I prepared my self-made floating raft hydroponic system and filled it with fertilizing solution same amount and concentration as I described in my previous post. For this experiment I used basil and lettuce plants which grew in turf on my window sill.
After washing roots carefully I replanted basil and lettuce plants into pots filled with clay and installed them into hydroponic setup. After that I hanged LED-bulb above plants and switched it on.
Now I'll watch how my plants will develop. I hope that this experiment will be successful!

Thursday, August 7, 2014

Lettuce on floating raft

I didn't write for a while because of massive amount of work and health problems. Therefore this time I'll briefly describe my experiment of growing lettuce hydroponically in floating raft system, also its results and conclusions.
3 days after planting lettuce seeds germinated. At this point I realized my first mistake. Every "How-to germinate lettuce seeds" manual I've read advised to water turf first and plant seeds afterwards. In a hurry I did it in wrong sequence - at first planted seeds and watered them afterwards. As a result in few cells I washed seeds too deep and they didn't germinate, in few other cells they moved and germinated too close to a wall of a cell.
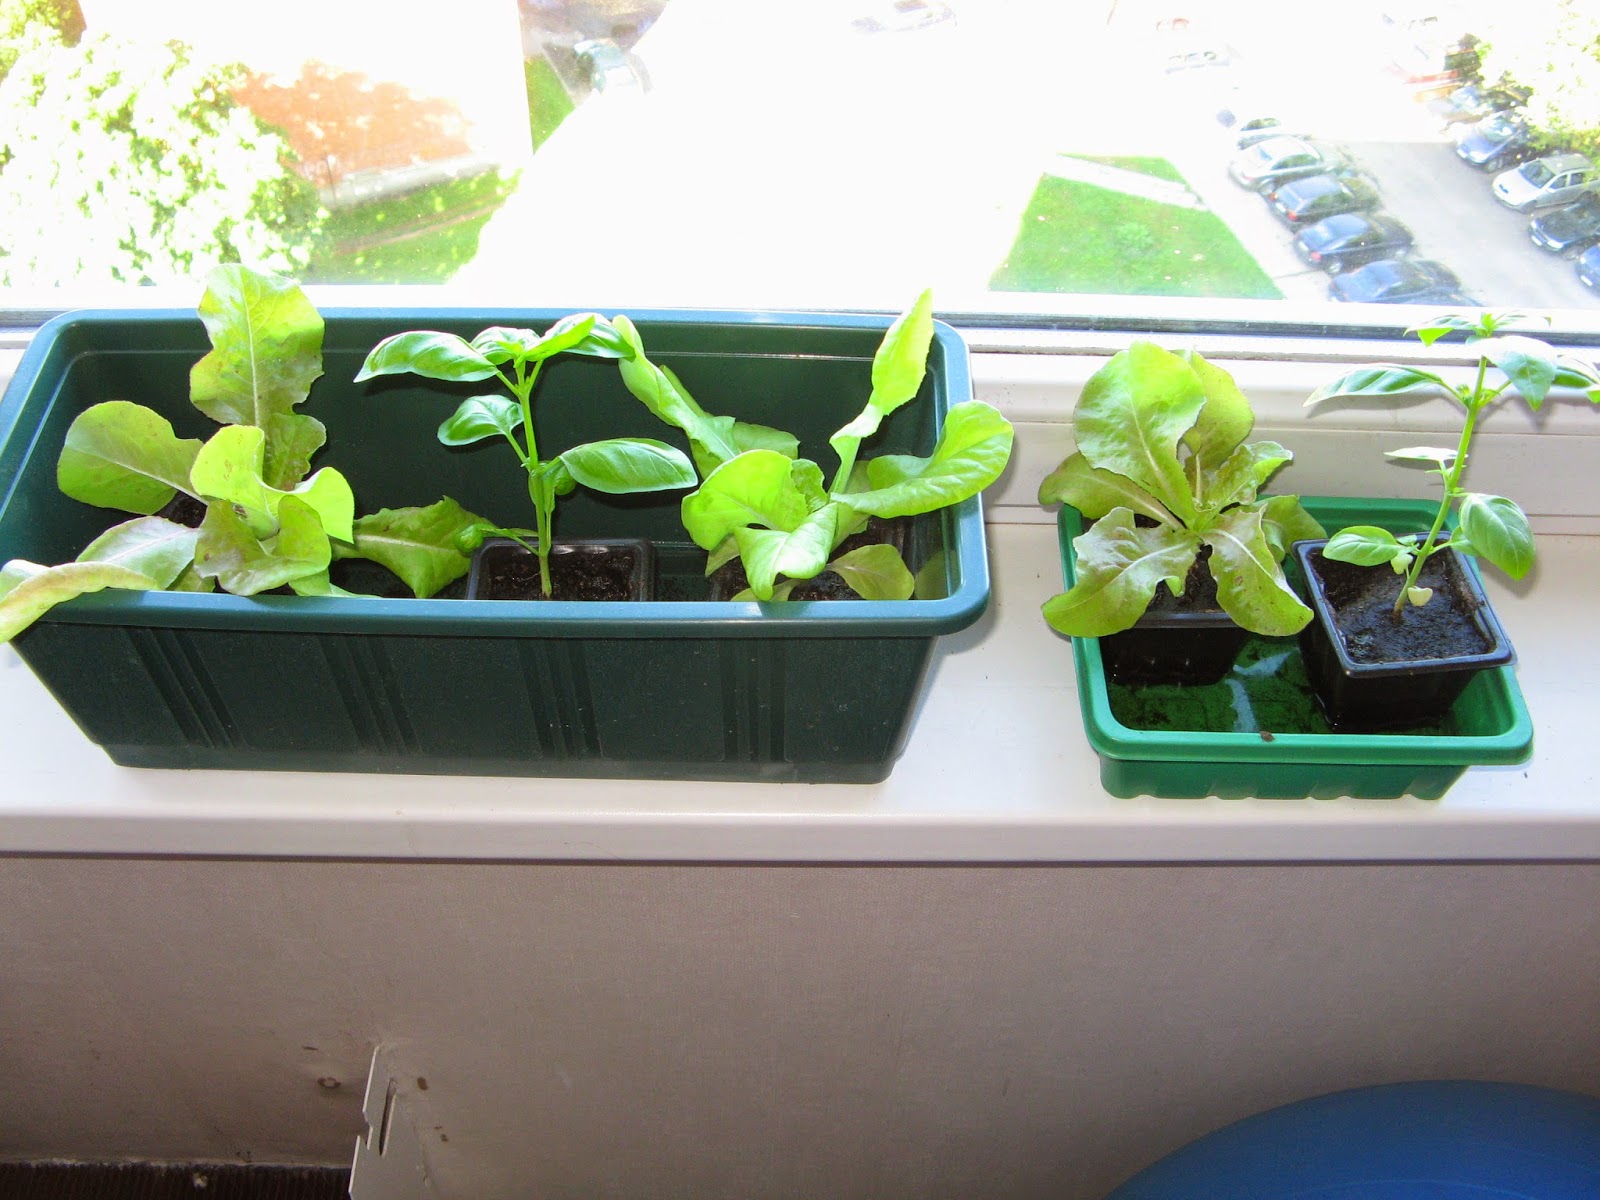
I took a cover off my mini-greenhouse and left my lettuce sprouts to grow on a window sill under sunlight. They grew well. This is how they looked after a week:
In about two weeks lettuce sprouts grew big enough to be replanted into my hydroponic setup.
I put my floating raft hydroponic system near a window, turned its aerator on and filled tank with solution. I used Vito 1 liquid fertilizer dissolved in water in recommended proportions for this experiment. I had to adjust acidity of solution by adding a bit of vinegar to lower pH level above 6.
After filling approximately 20 l of solution into a tank I put a foam rubber raft on a surface.
Then I started replanting lettuce sprouts to clay. I took them very carefully out of turf and washed roots under running water.
Holding lettuce sprout above a pot so that its root hangs inside I carefully filled clay.
At this step I realized my second mistake. Clay granules were too big for such a little sprout. It was very hard to make lettuce sprout maintain vertical position. Next time I will use smaller granules.
As I finished replanting pots with lettuce sprouts were installed into floating raft hydroponic system.
Next weeks brought me problems. First of all - direct sunlight reached my sprouts through a window just till noon. Another half of a day they received reflected light only. Second problem started day after I replanted sprouts into clay. Sky became very cloudy and long raining period started. The sun was very rare guest whole next month and sprouts desperately lacked sunlight. In a week they grew just a tiny bit.
Whole next month was cloudy and rainy. This is how my lettuce looked like by the end of it:
One plant died and was thrown out. Others were very weak. Leafs were very pale, thin and brittle. Instead of growing upwards they just lied on raft.
I concluded that my experiment failed. It became obvious for me that I never should rely on natural factors while growing in artificial circumstances. Next experiments are pointless without artificial light. I ordered led-lamp with 36 blue and 90 red diodes and 15W overall power. Next experiment will take place after I receive my order. I believe that light will bring me success.

Wednesday, May 28, 2014

DIY "floating raft" hydroponic setup

The name of this system perfectly fits its essence - plants are planted into holes on a raft which is floating on surface of fertilized solution. Commercial growers are using big sized rafts floating in big sized beds.
I decided to build small and compact hydroponic setup because my main goal right now isn't business but experience. To make it happen I had to find following materials:
- Plastic container from household goods store - 4 €
- Aquarium aerator, aero-rock and plastic air-conduit from zoo-shop - 9,5 €
- Sheet of foam rubber from construction goods store - 1 €
- Clay from gardening goods store - 1 € for 1,5 l
Planting pots. I didn't find anything suitable in Jelgava. So I made pots myself by cutting holes in plastic cups which I found at home.
Building small floating raft hydroponic setup took following steps:
- I put plastic container on foam rubber and drew its shape.
- Cut out the raft with necessary shape. In manuals it's usually recommended to use electric fretsaw for this purpose. I don't have one so I used a knife instead.
- Put cups on the raft and drew a circle around each.
- Cut holes in the raft with 2 mm inside offset so that cups fit tight and don't fall out. It's recommended to use milling cutter for this purpose. It cuts holes accurately and fast. I don't have such a tool so again I used a knife instead.
- Put a cup into container and drew a fat mark above. It will be hidden in filled setup. When level of fertilized solution will become too low this mark will appear. It will tell me that it's time to add more fertilized solution.
- Put aero-rock into container and connected it to aerator outside with air-conduit. Purpose of this step is to add oxygen into fertilized solution when this setup will be filled and plugged in.
- And finally I put foam rubber raft with cups into container.
So building this hydroponic setup costed me less than 15 €. Theoretically after filling this setup with fertilized solution and turning aerator on I can plant something into it. Only moist-soil loving plants (basil, lettuce e.t.c.) should be planted into floating raft hydroponic systems. In my next posts I will describe how successful this hydroponic setup was.

Thursday, August 1, 2013

Replanting basil

I didn't update my blog for a while because of having a lot of urgent work to do. Meanwhile my basil plant has experienced some changes and transformations. I'd like to describe all of them in one post.
Plant has grown enough to be replanted to hydroponic setup. Zachary Jones advised me to replant it after first set of true leaves. Unfortunately I've skipped first leaves because extreme lack of time - I had to finish and defend my diploma-work. At the moment of replanting there were already few sets of leaves on the plant.
Besides, seedling which sprouted on clay also grew a bit taller. I carefully took basil plant out of its cup with turf on its roots.
I made deepening in clay inside my hydroponic setup and put my basil plant inside. After that my plant constantly received full dosage of fertilizer. Besides roots constantly received oxygen from aerator.
For first 3 days there were no changes. I started thinking that replanting was bad idea. But apparently this time was necessary for adaptation. Starting from day 4 basil started growing very fast. This is how it looked approximately a week after replanting:
Unfortunately the seedling which sprouted on clay died. I think - because of overflow. Hereafter I filled hydroponic setup with fertilizer on regular basis and watered leaves with dispenser. After 3 weeks basil grew very big.
It's leaves are sweet. Added to a salad or porridge they added wonderful aroma to a meal. I never noticed same quality with basil from a store.
I decided also to describe my observations about my first hydroponic setup. Its undeniable advantage is easiness. Such a setup is very easy to build and also to use. But on other hand it has also huge disadvantages. This is open type setup. As a result fertilizer evaporates very quickly. In one month I spent about 5 l of solution. In my opinion it is quite big amount. Second disadvantage is size of setup - about 2-3 plants can be planted only. Enlarging it would mean also increasing expenses on substrate (in this particular case - clay).

Monday, June 3, 2013

Basil

Surprisingly two of ten seeds which I planted straight into clay finally sprouted.
I added 50% solution to water in the setup and put it under sunlight. It is interesting how growing will develop.
Besides basil which I've planted in paper coffee-cup has grown much bigger.
I think that quite soon I will be able to replant it into my hydroponic setup.

Tuesday, May 21, 2013

The first basil sprout

One week have passed since I planted basil seeds. One of them finally sprouted.
This is sweet basil 'Holy'. Unfortunately other seeds died. I put a paper-cup with seedling to window sill to receive sunlight. Since now I'll have to water seedling 3 times per week and feed standard nutrient solution 2 times per week (info from http://hydroponeast.com website)
Besides Виталий Марин gave me an advice to try planting seeds directly to ceramsite. He also showed me a picture where this method gave him results. I decided to give it a try. I filled my hydroponic setup with water to which I added a bit of vinegar to keep pH level at about 6. Then I poured about 10 seeds into it, turned aerator on and covered setup with folded cheesecloth to keep seeds in darkness. Hope that this one will succeed.

Tuesday, May 7, 2013

Ending of 1st experiment

One week have passed since I replanted spinach seedlings into hydroponic setup. Till this week not only seedlings didn't grow at all but they've also became weak and withered. Unfortunately I had to admit that my first experiment failed.

I allow three possible reasons which led to failure:
1. Most possible that amount of light from one bulb is not enough for plants. Yet it has high intensity of light output but its spectrum isn't as wide as HID bulb's.
2. Germination took place on mineral-wool for construction purposes. I am not sure but it could possibly contain some toxic elements.
3. I never checked Ph level of water. I think that it was about normal because seedlings germinated. But to be 100% sure I have to buy Ph-meter.
My next step will be a try to grow seedlings under sunlight near window. Very soon I will buy HID bulb. Then I will be able to try growing under fully artificial circumstances again.

Replanting of spinach

One week have passed since I replanted spinach seedlings into bigger mineral-wool cubes and placed them into growhouse under artificial light. Unfortunately they didn't grow at all.
Roots of seedlings didn't grow also. I made a decision to replant small mineral-wool cubes into hydroponic setup and watch how growing will develop then. I filled container of my setup with nutrient solution and turned aerator on. Then I carefully replanted seedlings into ceramsite and placed hydroponic setup into growhouse.

Every following morning I turned light in growhouse on and turned off every evening.
I've also shot short video to show how aeration occurs in my hydroponic setup.

Monday, April 29, 2013

Easy hydroponic setup

This time I'd like to describe quite easy hydroponic setup made by myself. It consists of container, substrate and aeration system. I bought container at local garden-shop.
For aeration I used aquarium aerator and aero-rock which I bought at zoo-shop.
I picked aero-rock so that it was almost as long as my container. As a result roots of my plants will receive oxygen evenly at any place in container. I connected aero-rock to aerator and put it into container.
As a substrate I used ceramsite which I bought at flower-shop.
For following after fertilized solution level in container I took a plastic bottle, cut off its bottom and neck and put it in one corner of container. Then I added ceramsite to container.
Now I can fill my setup with fertilized solution through cut bottle. Cellular ceramsite will stay above solution, and I will be able to plant my seedlings in it. After turning aerator on, roots of my plants will be constantly supplied with oxygen.